App Attach with Entra ID Joined hosts
While I was preparing a session for the MEM Summit 2024 I noticed the new preview of App Attach for Azure Virtual Desktop. The interesting this about this new preview is the support of Microsoft Entra ID joined session hosts, and since our session will be about Azure Virtual Desktop with Entra ID joined session hosts I thought it was great to add it to our presentation.
Table Of Contents
Now let’s get started!
Tip
App Attach is currently in preview
Differences between MSIX App Attach and App Attach (Preview)
There are some major differences between the currently available MSIX App Attach and this new preview. Most of the differences are related to improving the administrative and user experience.
Per user permissions
You will now have more control over which applications your users can access within their remote session. This is due to the fact the permissions are now applied per application per user instead of assigning them to an application group. Applications will only be shown to the users you choose.
Multiple host pools
The same application package can be used across multiple host pools. You can easily select which hostpool the application can be used.
Application upgrades
You don’t need any maintenance window anymore, you can easily upgrade to a new application without interupting your end users work.
Multiple versions of application
Users can now run two versions of the same application concurrently on the same session host.
Appx and Appx bundles
You can now also use the .appx and .appxbundle file format with this preview of App attach.
Support for Microsoft Entra ID
In my opininion this is one of the greatest new features of App attach. This means you can now use App attach with your Microsoft Entra ID session hosts.
Getting started
Let’s start with the configuration. The goal of this post is to provide more information to setup and use App attach with Entra ID joined session hosts. For this guide I will be using an Azure Files storage account for my applications. My test applications are all converted from an .msixbundle to an CimFS format. The main reason for this is the performance comparing to VHD.
Prerequisites For this post I am focussing on Microsoft Entra ID joined session hosts.
- An existing host pool with session hosts
- You need a powered on session host
- The host pool needs to be configured as a validation environment
- Your session hosts needs to be Microsoft Entra ID joined
- Reader and Data Access roles assigned
- 1 or more MSIX images
- a resource group which will contain the App attach packages
Azure Files
Since we are going to provide the Azure Virtual Desktop and Azure Virtual Desktop ARM Provider service principals permissions to allow reading and accessing data on your storage account I would recommend to create a seperate storage account and fileshare for your App attach applications. You will have more granular control to allow this kind of access. I won’t go into the details on how to create the storage account and/or fileshare.
RBAC roles
As already mentioned we need to give the Azure Virtual Desktop service principals permissions to allow to read and access data from the Fileshare.
Tip
Keep in mind that depending on when you registered the Microsoft.DesktopVirtualization resource provider the naming can be either Azure Virtual Desktop or Windows Virtual Desktop.
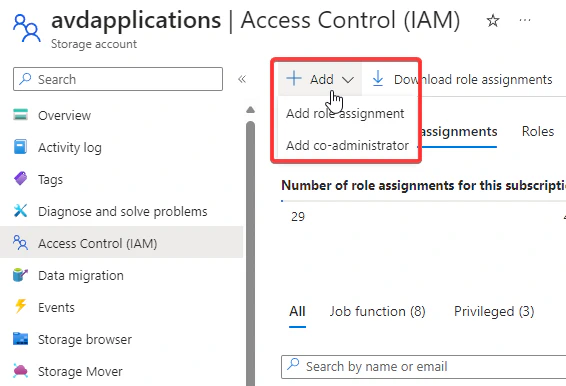
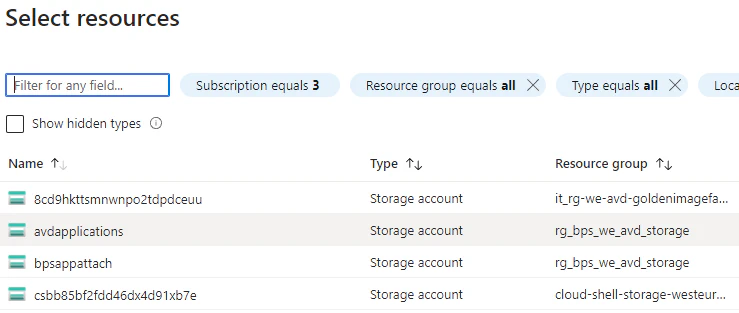
Navigate to your storage account which you will be using to host the applications.
Go to Access Control (IAM) and click on Add Role Assignment
- Now search for the Reader and Data Access role and click on Next. Now we need to assign the correct service principals to this role.
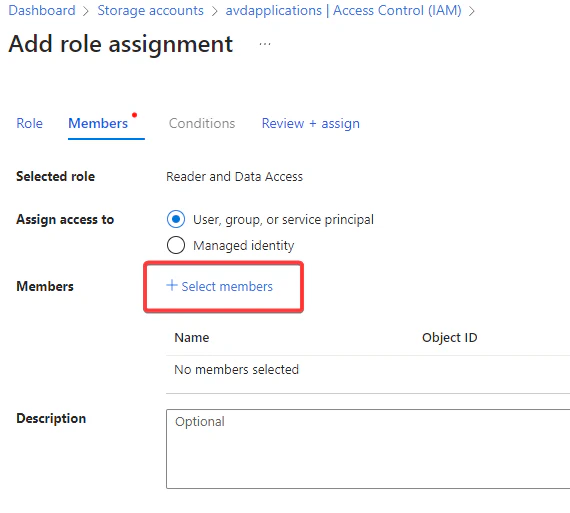
- Click on Select members and search for both the Azure Virtual Desktop and the Azure Virtual Desktop ARM Provider.

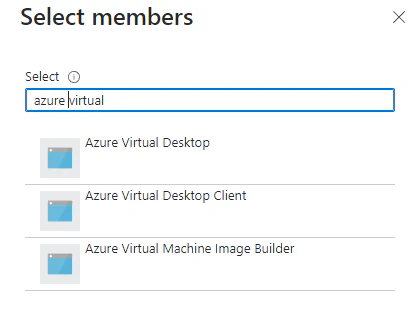
You can validate the correct service principals by looking at the Application ID.
Azure/Windows Virtual Desktop 9cdead84-a844-4324-93f2-b2e6bb768d07
Azure/Windows Virtual Desktop Client a85cf173-4192-42f8-81fa-777a763e6e2c
Azure/Windows Virtual Desktop ARM Provider 50e95039-b200-4007-bc97-8d5790743a63
- Now validate the correct RBAC roles have been assigned to your storage account.

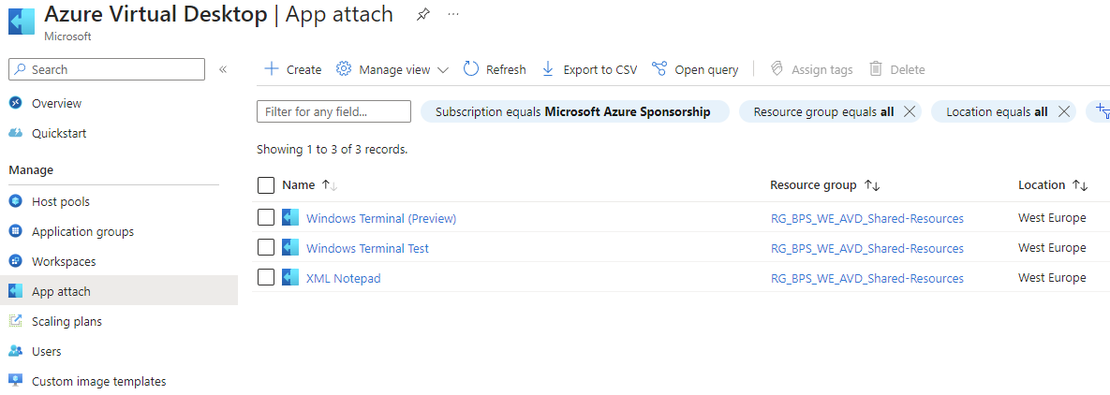
Adding applications to App attach
Now we are ready for the good stuff! For session hosts which are only Microsoft Entra ID joined the role assignment as described is basiccally the 1 requirements to allow the Azure Virtual Desktop service to see and use the applications.
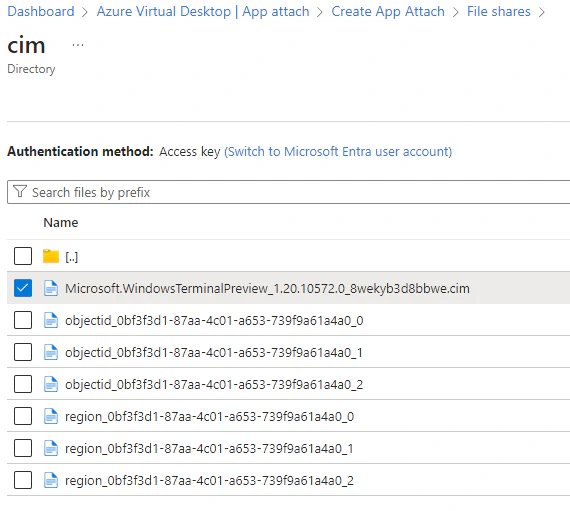
I have created a few demo applications via the MSIXMGR tool. I just downloaded the .msixbundle for in this case the Microsoft Windows Terminal (Preview), extracted the content and converted it to a CimFS image. This CimFS image of the application is a combination of multiple files.
There is one file with the .cim file extension and this file contains the metadata. Together with an objectid_ and region_ file(s) which contains the actual application data.
Uploading the applications
Within the fileshare I have created an folder for each application, inside this folder is the version to keep track and organize the images.
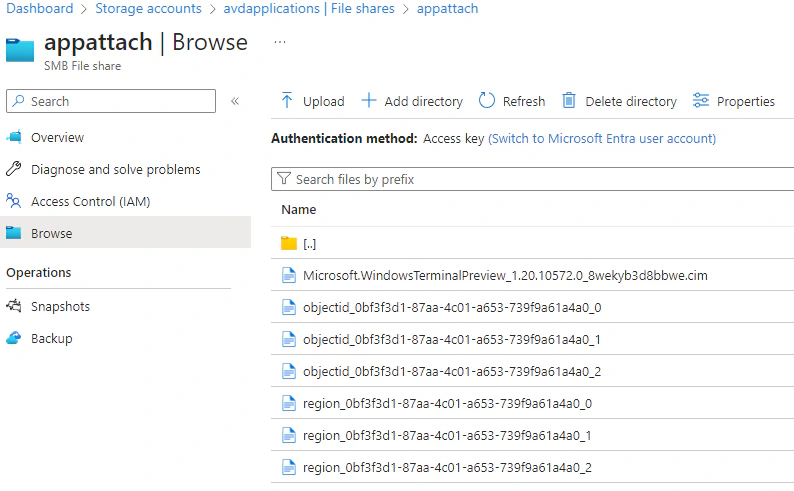
For testing purposes you can easily upload the files to your storage account. Just create a folder structure and upload the correct files.
The following file formats are supported by App attach
- .vhd
- .vhdx
- .cim
- .appv
The portal will throw an error if you try to use an invalid file type during the creation of the App Attach application.

Add an application
Now we are ready add on application to Azure Virtual Desktop as an App Attach package. This can be done in two ways. For this guide I will be using the Azure Portal. The other option is to use Azure PowerShell.
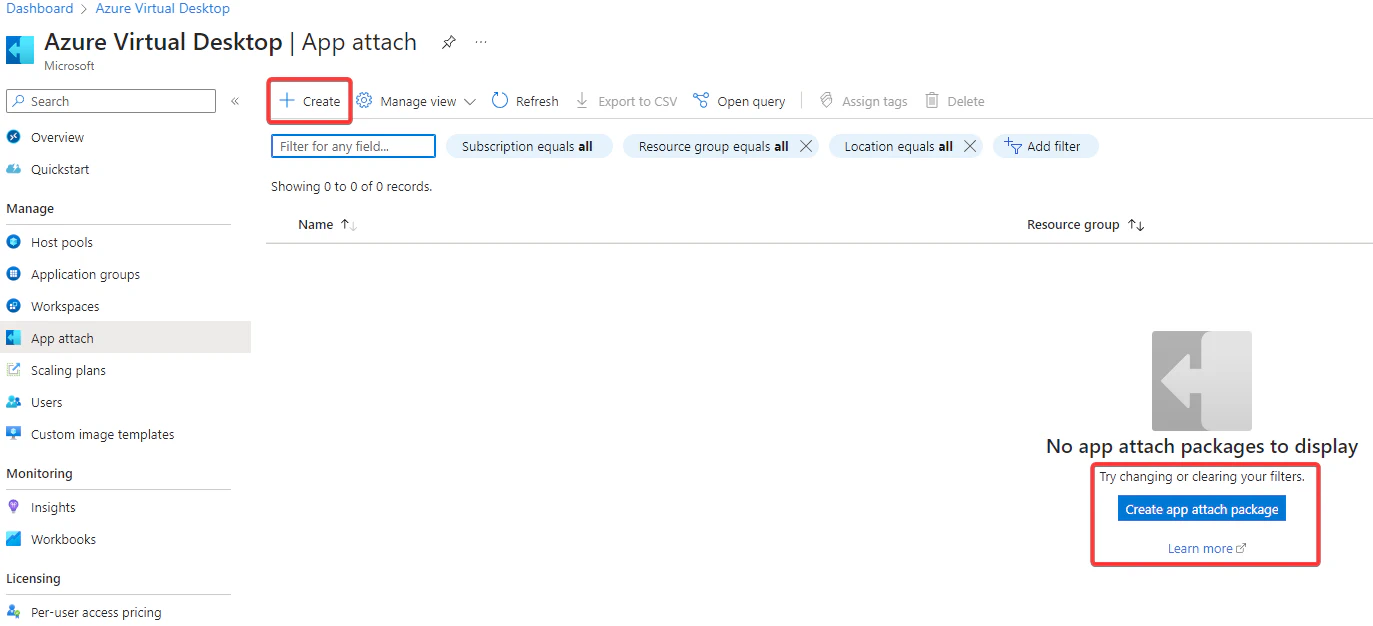
- Navigate to the Azure Virtual Desktop overview

- Select App atach and then select + Create
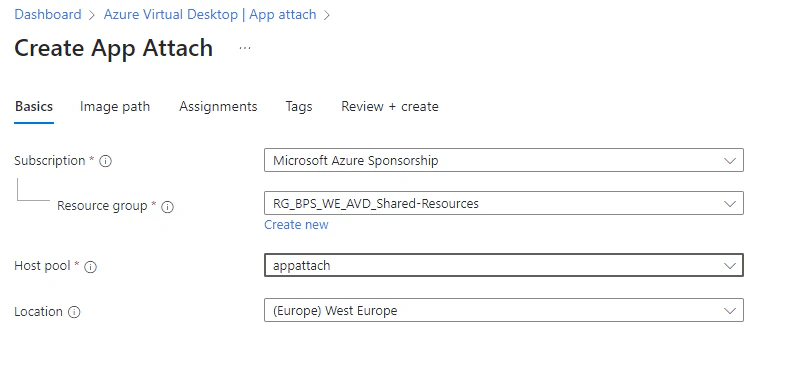
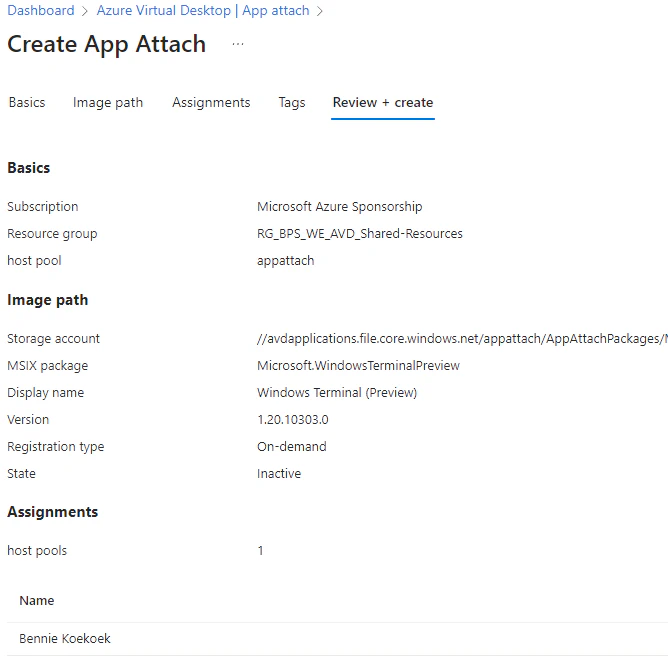
- The first step is to provide some basic information for the App attach package. The resource group will be used for the App attach package and the hostpool will be used to extract the package and retrieve the metadata.
Proceed to the Image path tab, althought it looks quite simple I had some major issues getting through this step. I have gathered all the events and screenshots, you can skip to the troubleshooting part if you have any issues.
First step is to select your storage account, Microsoft made this very easy. You don’t need to remember all the paths. Just select the storage account which you already have created with the correct RBAC roles in place and you should be good to go.
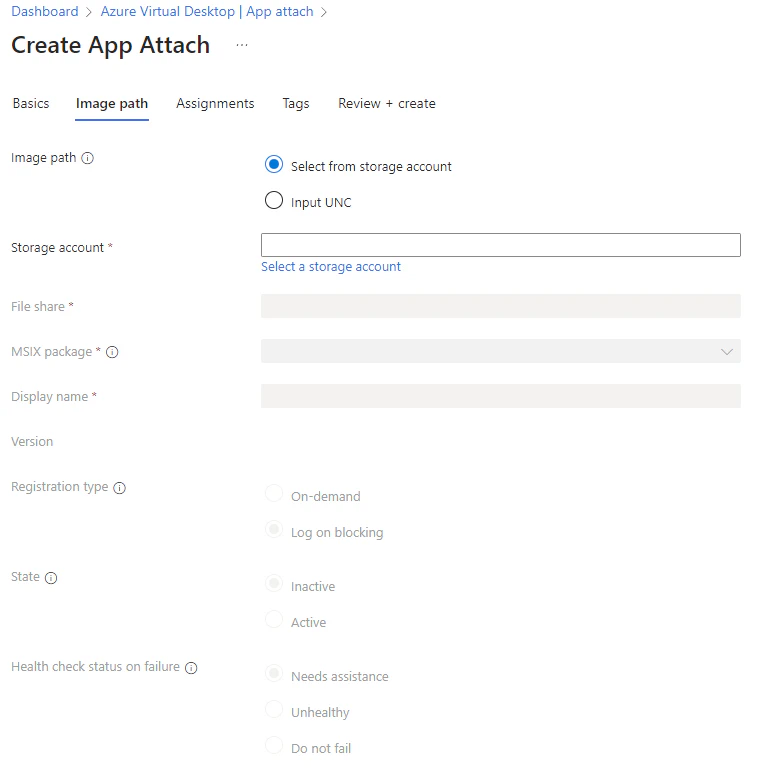
- Next, select your file share. You need to browse to the file share and the directory your applications is in. Check the box next to the application image you would like to add. In my case this is the file with the .cim file extension. Then hit Next.
Warning
If there aren’t any session hosts powered on you will receive an error. During this process you will need to have an session hosts up and running to let the App attach service expanding the information from the package. You will need to rerun the wizard, turning your session host on isn’t enough.

- Since this package is created from an .msixbundle, the image will contain multiple packages. Select the correct package.
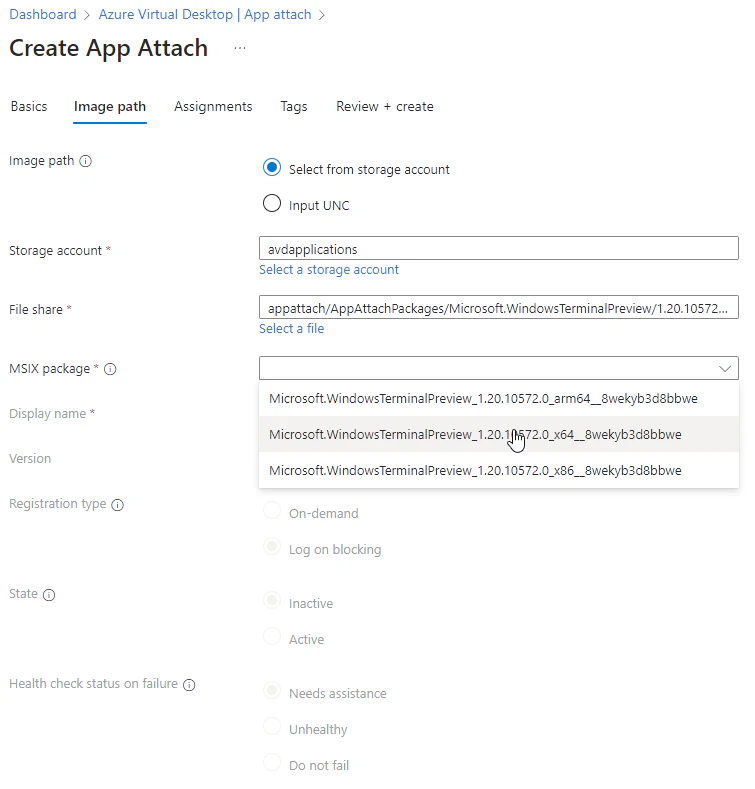
Now you can validate if the version being shown over here is the correct version of the application. This information is being extracted from the package. For the last details we need to fill in a Display name, this will be a friendly name for the end users.
Now we need to decide which kind of registration we would like to use for this application. App attach will mount the image containing the application during the sign-in process. After that a registration process makes the application available to the user.
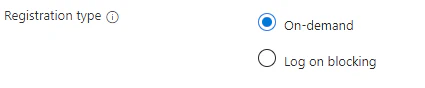
On-demand This will be my recommendation since it won’t affect the sign-in process. This is also the default. With this option the full registration will take place when the user starts the application.
Log on blocking With this option the registration will take place during the sign-in process, thus it will impact the sign-in experience.
If you want the application to be available right after this wizard you can select Active. Inactieve applications won’t be visible for the end users. You can always change the state of an App attach application.
If an application fails to stage for a certain session host you can configure the Health status of the session host. I tried to find the difference between Needs assistance and Unhealthy. The only thing I could think of was if the session host would allow new sessions. The documentation isn’t clear about the Unhealthy status. I will perform some more testing to figure out the impact of both options.

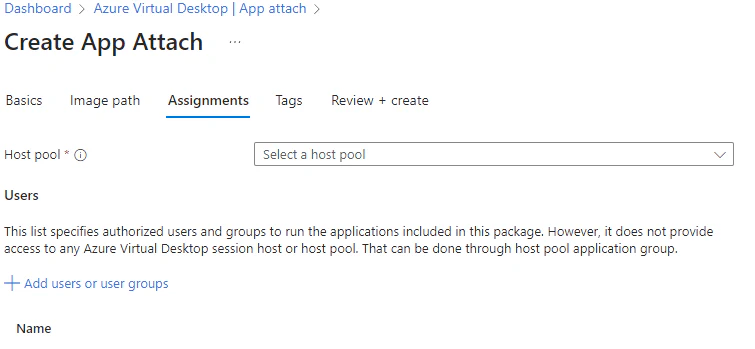
- Optional: You can assign the package to other host pools and assign it to your users. You can also use groups to assign the application to your users. Ofcourse you can change it after this wizard.
Optional: Since the packages are Azure resources you can tag them to identify and/or maintain. You can apply your tags in the next screen.
That’s it, we are ready to create the first App attach package. Navigate to Review + create, validate your settings and hit Create
You will see the App attach package pane right after the package has been created. Within this view you modify the existing packages. You can perform updates, change assignments and see
Troubleshooting
Error expanding msix app attach package
You need to turn on a host
Hope you enjoyed this post, if you have any questions or feedback please feel free to reach out to me.
Have a great weekend!
Sources
MSIX app attach and app attach - Azure Virtual Desktop | Microsoft Learn